I have been making heatproof pads as covers for the lids of Agas, Rayburns and Everhots for a few months now, and am finding it difficult to keep up with demand. Many people seem to be finding that there is not much commercially available and the fabric choice is limited. Perhaps some of you would like to whip up your own to match your kitchen or cooker? You can make them up in any size to use as a heatproof pot holder, place mat or whatever, They are so useful!
You will need 4 layers; cotton terry towelling,
cotton batting or wadding,
heatproof layer (Insulbrite)
decorative cotton top layer. I use a cotton curtain or upholstery weight fabric.
These need to be cut to size and then attached together. I use 505 temporary adhesive to keep the layers together and then stitch the layers together on the machine. You can stitch any pattern that suits the fabric, or just opt for straight lines. A walking foot is very useful here, but it can be done with an ordinary foot, just take care the layers don't slip.
Now the layers are securely together you can trim carefully to make sure the pad is exactly the right size, the layers are together and the corners are square.
To neaten the edges you will need to bind them. You can make your own binding (it doesn't need to be bias binding, it can be cut from the straight grain of the fabric) or you can buy bias binding for ease, which is what I tend to do. You will need to buy the widest one you can.
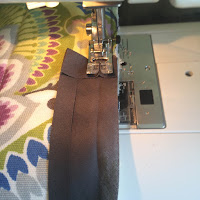
To bind, open out the tape and lay one edge against the edge of the top of the pad. fold over a couple of centimetres of the binding at the start to neaten the edge when you have finished.
You will need to stitch in the crease line closest to the edge of the pad.
If you would like beautifully mitred corners follow these steps;
 |
| Stitch almost to the corner, then fold the binding as shown |
 |
| Fold the binding back on itself at a right angle |
 |
| Lift the foot and begin stitching from the top of the next side. |
  |
| When you have finished adding the binding it will fold back like this. |
Once you have stitched all of the way around the binding on the top side, you need to turn over and secure the binding on the back. (At this point you can add a strap to hook around the handle to keep the pad in place when you lift the lid. See below for this optional extra.)

 |
| I use the stitch that puts my needle to the left, closest to the edge of the binding |
When you get back to the beginning, your pad is finished.
It can be pressed if necessary. It can be washed at 40 degrees, which may cause it to shrink a bit giving it a lovely wrinkly look. In my experience it tends to grow again as it sits on the lid.
Optional extra; hanging loop
This can be made with a left over piece of binding, but it will be sturdier if made with an offcut of your top fabric.
- cut a piece roughly 20x10cm
- fold in half longways, right sides together
- stitch along the top and down the length with approx 1cm seam allowance
- clip the top corner
- use a chopstick or similar to push the loop through so right sides are outside. Push out the corner
- press flat
- attach velcro; hooks to closed end and loops about 6cm up from open end.
- find the centre of the towelling side of the pad
- pin the loop into the binding at the centre before stitching the towelling side.
- stitch the loop into the binding as you sew around the pad. (I reverse the stitching once I have gone over the loop, so I have stitched forward and back and forward to secure it)
- once the binding is finished lift the needle and stitch forward and back and forward over the loop at the outside edge of the pad for extra security.
 |
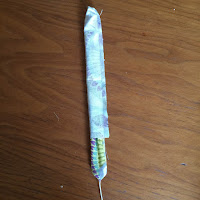
| Here I have stitched a piece of string into the loop to help with turning |

If you use this tutorial I would love to see what you make and would be interested to hear how you got on. I'm always happy to answer questions. Good luck.
I hope to see you on Facebook or Instagram.


Do you use heat resistant toweling or any Terry toweling?
ReplyDeleteAny cotton towelling is fine to use
Delete