Saturday, 15 March 2014

How to make bunting


Bunting is such a simple, but such an effective thing to make, it is a brilliant place to start if you are new to sewing, lacking confidence or just want to get back into it. You can use new purpose bought fabrics, you will need about half a metre of fabric for 2 1/2 to 3 metres of bunting. It also works well with scraps and is a great way to upcycle old clothing. There are lots of steps here, but I have really tried to break it down and hold your hand all of the way through. Go on, give it a go...

You will need 3 metres of 2.5cm binding, enough fabric to make about 24 triangles (half a metre of fabric in total will do the job with some spare) and an isosceles triangle cut from card.


  • I cut my card triangle from a cardboard box, a cereal box would be ideal. Mine is 20cm along the long sides and 16cm across the top. `
  • Fold your fabric double so you can cut two triangles at a time. Trim the length of the fabric to the size of your triangles. To cut the first pennant (that's the correct name for each triangley flag) you will have to cut along the two edges, then just flip it and cut the next edge.
 

  • Once you have cut about 24 triangles (12 fronts and backs) you are ready to stitch them together. Make sure that right sides are facing. Using the edge of the machine foot against the edge of the fabric to keep your lines straight and even, sew along the long edge of each pennant. Keep the needle down so that you can lift the foot at the tip and just pivot the fabric around the needle to sew back up the other edge.
TOP TIP NUMBER 1; Do not try to break your thread moving from one flag to the next, just sew a few stitches between each pennant then feed the next one through. This is called 'chain piecing' and it saves thread, mess and time. When you have stitched all of the triangle backs and fronts together you can snip between them to separate them all. 


  • Once you have separated all of the flags you need to trim the points and top corners, this is to get a sharp point and smooth top when you turn them.

  • Using a chop stick, skewer or other pointy stick, turn all of the pennants right way out. carefully but firmly push the point out with the stick. If you find that you have clipped too close or pushed too firmly, and go through the end with your stick, don't panic, just add another line of stitching slightly inside the first to close the gap and try turning again.
  • Now go to your iron with all of your turned triangles and your card triangle. TOP TIP NUMBER TWO; when pressing each pennant, insert the card template into the flag. This will push the sides seams out and make it the correct shape with ease. Press away. At this stage your bunting will start to take on a really nice look and you will be able to begin to appreciate what it will look like when finished.


  • Arrange the pennants into a sequence that you like the look of and it is time to sew it all together.
  • Take your length of binding and fold the corners into the centre, then fold that little triangle into the length, this will give you a lovely neat edge.


  • Now fold the beginning of the binding in half along its length. Stitch across the width to finish the end, pivot on the corner and continue to sew along the doubled length of the binding to sew the two sides together. Continue for 10-25cm depending on the length of your binding, this will give you ends that you can use as ties. Measure the same length from the other end of your binding so you will know when you get there.
 
  • When you are 10-25cm along your binding you can begin to insert the pennants. Simply leave the needle and foot down, open the edge of the binding and slip the top edge of the flag in. Then close the binding and continue stitching.


  • When you reach the end of each pennant just keep sewing until the corner has moved to the back of the foot, then add in the next one. This will ensure that your pennants are evenly spaced.

  • Keep adding pennants until you get to the part that you marked for the tie at the other end. Finish as you started with a little triangle turned in to neaten the end and pivot on the corner to sew closed. 
Congratulations, you have a wonderful length of bunting, now go and hang it in your bedroom/the kitchen/the garden/ your son or daughters room/ give it to a friend as a special handmade gift!

If you don't have the time or resources to make your own bunting, let me do it for you. I usually have some in my Etsy shop, and am always happy to make some to order. 

For ideas of themes for bunting why not search the internet? You could start with my Flickr album!

And above all else, if you do use this tutorial will you please let me know how you get on? Good luck.

Wednesday, 19 February 2014

Reading

I love reading, I have always thought that if reading was good for your health, like exercise, I am sure it would be no trouble to fit more into each day in, it is difficult to exercise because I just don't like it.

Anyway, last night I finished a book and it has leapt straight into my top five books of all time. I enjoyed it so much I now want to recommend everyone to give it a try. It is by David Mitchell, the author of 'Cloud Atlas' which I enjoyed but wouldn't rave about. It is called 'The Thousand Autumns of Jacob De Zoet'. I bought it on  a whim and was expecting it to be a bit heavy going and a bit chewy, however I was hooked from the first chapter. Do you ever find you have read a book and can't remember if it was a film you saw or a book you read? Well for me this will be one of those, it is so vivid and exciting and, I'm sorry, a bit horrifying in places. I found some evenings I couldn't put the book down because my heart was racing with adrenaline. It even made me exclaim out loud in several place, to my husbands irritation.(He's an exerciser not a reader.) I found myself keen to go to bed at night just to fit an extra chapter in and found elements of the story creeping into my dreams too. I'm not going to tell you what it's about, that is irrelevant, I had no idea at all when I picked it up. It's a gripping story and I just wanted to let you know.

The other books in my list are; 
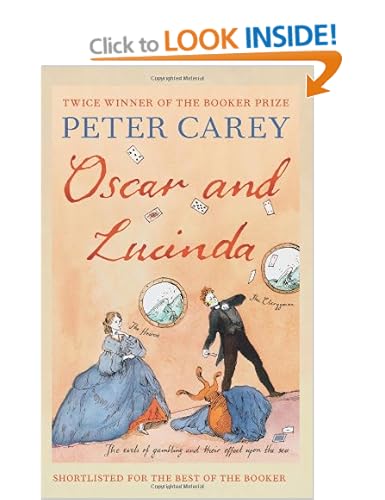
'Oscar and Lucinda' by Peter Cary- again don't worry what it is about, I put off reading it for ages because the subject didn't appeal, but it really is my absolute favourite! 
'Jude the Obscure' by Thomas Hardy- I love anything by Hardy, but this particular novel is his best, brilliant despite being a set text for my A level. 
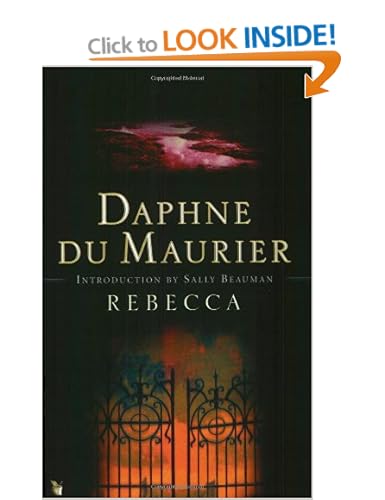
'Rebecca' by Daphne Du Maurier- another vividly written story that had me exclaiming out loud on one memorable car journey to Oxford, my husband was not amused then either. 
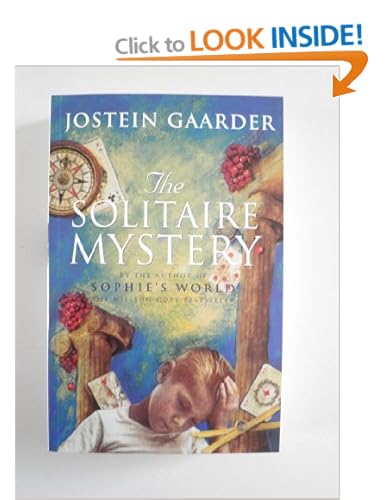
'The Solitaire mystery' by Jostein Gaarder- a less well know book by the author of 'Sophie's Word'. This one looked like it may be chewy, but I found it to be a real page turner. A book within a book too, brilliant device! 
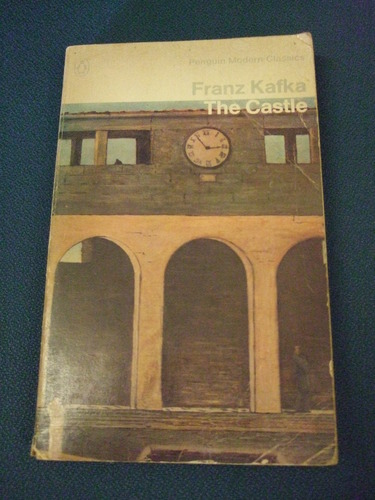
And one more that has perhaps been knocked down to 6th place... 'The Castle' by Franz Kafka. I'm not sure I got everything I should from it, but I sort of let it wash over me and found it hard to remember if I had read it in a book or seen it in a film. 
I'd love to know if you follow up any of these recommendations and how you get on with them if you do! Do you have any recommendations for me? I'm going to find it difficult to find anything to follow 'Jacob De Zoet' 

Friday, 3 January 2014

Ramblings about blogs and quilts

Happy New Year Blogland!

It is 7 months since my last post and I have thought of loads of things I could be blogging about, but have instead been reading more and more blogs. They are all sewing related (I can't think why).
I first began to follow the clever, funny, and seemingly very gentle Florence on Flossie Teacakes (I know I have mentioned this before) and always look forward to a post. She has a wealth of excellent links, recommendations, superb tutorials and adverts for useful shops. My first ever quilt was made using the tutorial on this blog


 Here it is 3 years later looking well loved and bearing up fairly well.(I gave it to my friends daughter- the gorgeous girl pictured here)

I also follow 'I'm a Ginger Monkey', Katy Jones,  it was her who inspired me to have a go at my first large scale quilt, using the 'scrappy trip along' this time last year.


Once again it was Florence from Flossie Teacakes who inspired me in my current major project by talking about English Paper Piecing. I had seen this described before (in the Liberty Book of Home Sewing)
and thought 'no way!' This was also my thought when reading her descriptions of the process, despite claiming it was highly portable, which I now understand it is, and the beautiful results she achieves, which I never will! However, gradually I persuaded myself I needed a longer term project, and somehow talked myself into this being the one.
I have been working away at it almost every day for several months now, I'm not sure exactly when I started it, I am just about to start piecing it together into one large quilt top. That will be several weeks work- there is more than pictured here.
Then of course i will need to put the quilt sandwich together and then quilt it! (To hand or machine quilt?)

I keep asking myself 'what is the rush to finish?' After all I wanted this to be a long term project. The thing is, it always exciting to see what the next stage is going to look like. There is also the fact that I have ordered the fabric for my next big quilt.

 
The first I will have made out of purpose bought fabric rather than scraps. I am happily researching designs that I can use for that. I think I know how I will make it now. But I am not sure what I will do with all of these quilts!

The trouble is, because quilts are expensive to make and because I most enjoy working at the edge of my capabilities and learning new things, so they are never exactly perfect, I can't sell them or even give them to people really. So instead our house will be filling up with more quilts during 2014.  And I will continue to enjoy the process of planning, learning, buying, more learning and making.


Oh, and here are a few of the mini quilts that I have been able to give away or sell...

And of course there are still bags, applique pictures, a commission for 28 meters of bunting, clothing and more plans, and not enough hours in the day!


Thursday, 20 June 2013

Summer giveaway

It is nearly the summer holidays and I can't wait! I have decided to celebrate with a give away. Anybody who comments below what their favourite way is to spend a summers day,  between now and 8th July (when my son breaks up for the summer)  will be entered into a draw to win a FREE drawstring or tote bag.


 Better than that, I haven't made the bag yet, so the winner will be able to personalise it with a name or choose an appliqué image. 
I will draw the name of the winner on the evening of Monday 8th July, so check back here or on my Facebook page https://www.facebook.com/yellingpig that evening to see if you are the lucky person.  If all goes to plan the bag should be with the winner by the beginning of the following week.


Thanks for your support and good luck!

By the way; If you prefer you could send your email address to yellingpig1@gmail.com  with the subject heading 'bag giveaway'

Friday, 17 May 2013

Tote bag tutorial


Hi, I thought Id have a go at writing a tutorial. it is a pretty tricky thing to do well (unlike making this bag which is quite straightforward) so please let me know if you follow it. I'd welcome feedback and I'd really love to see your finished bag!

You will need;
  • outer fabric (something fairly heavyweight, I used some curtain fabric that I got out of the remnants bin in John Lewis).
  • inner fabric (a coordinating cotton).
  • medium weight iron on interfacing (I really like 'iron on canvas' again from John Lewis).

From this you will need to cut;
1x 37x85 cm of all three fabrics for the main body of the bag.
2x 58x8cm of the outer fabric for the handles.
1x 18x16cm of the outer and the same of inner fabric for the inside pocket.


  1. (A) Make the pocket right sides of fabric facing each other, sew 1cm from the edge all the way round, leaving the needle down to pivot on at the corners. 
          Leave a 4-5cm gap along the bottom edge for turning.
Turn right sides out

clip corners


Press pocket flat.

(B) Sew pocket to lining-
Find centre of pocket and centre of bag, line these up about 12cm below one short edge of the lining fabric, right side to right side of lining fabric.
Sew as close as possible to the edge down one side, across the bottom and up the other side, this will close the gap you left for turning.
I like to make a line of stitching about a third of the way along to create two internal pockets.
Sewing a small triangle at the top corner where you begin and end stitching helps to keep the corners strong.
The pocket is sewn to the lining fabric, note the triangles on the top corners

2. Iron interfacing to wrong side of outer fabric.

3. Turn outer fabric right sides together, sew sides with 1.5cm seam allowance.

4.Repeat (3.) for lining fabric, but leave 6-8cm gap in one side for turning.

5.On outer, then lining fabric, mark 4cm from bottom of bag. 
Fold corners into triangles and stitch across. This optional step creates a nice flat bottom to your bag.

6.Make handles; fold handle fabric longways, right sides together, sew down long side 1cm from edge. 
Use a 'pushy thing' (I safety pin the top corner to skewer and use that) to turn the handle through its length so it is right side out. 
Press.
My device for turning the handles.
Pulling the handles through to the right side
Pressing the handles with the seam to one side
 
7. Pin bag together; 
With lining and outer bag right sides facing each other, pin side seams at the top of the bag. 
Work around the top of the bag, pinning the lining to the outer. 
During this process feed the handles between the two fabric layers, taking care that they do not twist. 
Pin the ends of the handles level with the top of the bag.
 I fold the bag in half and then in half again to mark the quarter, this is where I position each handle.
This is the sandwich of lining, handle, outer fabric. Right sides are together
8. Sew bag together; Sew around the top of the bag, 1.5cm from the edge.
Stitch all of the way around the top.

9. Pull the bag the right way around through the opening in the lining.

 Close the hole in the lining by simply machining close to edge, as it is inside the bag it will not be seen.
Machine close to the edge to close the hole left for turning


10. Press the top of the bag to get the lining and the outer sitting flat, then top stitch to finish.
 I like to use one of my machines decorative stitches in a contrast thread but a plain straight stitch would finish the bag nicely and keep the handles secure.      
Press the top of the bag flat.
My 'topstitching' is a decorative herringbone.

YOU HAVE FINISHED YOUR BAG, WELL DONE!

Variations?
- you can alter the dimensions, this bag will work at all sorts of sizes and shapes.
- Try appliqué or embroidery as decoration on the bag.
- The pocket could go on the outside of the bag
- To close the bag you could add a tab and button, just include a tab like a short length of strap between the handles on one side. Add a button hole to this and a button on the opposite side once you have finished and your bag will fasten shut.


My finished bag. I added the machine appliqué before I made the bag.


Thursday, 9 May 2013

Sewing for friends

One of my favourite things to do is sewing for friends.

When sewing a gift, the pressure is lifted somewhat. Usually it is something they are not expecting, so there is no nagging doubt 'is this what they had in mind?' or 'will they think it is worth the price' or 'is it good enough' which can come with commissions (although even with these I find the following usually applies)

The very best thing about it is spending the time thinking about that person. I find that I spend the hours it takes to plan and make something thinking very fondly of the friend, of their likes and interests, of times we have spent together, of their personality, sense of humor and so on. Although I usually regret that I do not get to see more of most of my friends, I find making something for them almost like spending time with them in a strange way. 

Often I will be making because I will be seeing them again soon, which is thrilling in itself. Sometimes I will be posting the gift, and everyone loves getting a surprise parcel through the letterbox. But always there is the sense of anticipation and the hope that they will be pleased with what I have made, with the time invested and thought process, hopefully it is something that captures their taste and that they will like it. At the very least I hope they will somehow sense the positive thoughts and memories that go into making each present special and unique, after all that someone is certainly someone quite special to me.

Wednesday, 17 April 2013

The end of the school holidays

Today marks the end of my son's four week Easter holiday and tomorrow is the last day before I go back to school too. It has worked out that I have had nearly four weeks off too because of the way my work dates have fallen. I think it is in some ways harder when it comes to an end after a longer period than a shorter one. I can't say I am ever delighted to loose the company of my lovely boy, or to go back to work myself but this holiday it seems particularly hard that it is coming to an end.

Despite loosing a week to the worst tonsillitis I have had in years, this holiday has been easy, companionable, exciting, relaxed and generally rather wonderful. The improvement in the weather has helped, the change in the clocks always seems to make things more relaxed, but most of all I think that the latest episode in my husband's smallholding enterprise has put a lovely glow on everything.

Let me start from the beginning, for the last ten years or so we have kept pigs for fattening and chickens for eggs. Last year my hubby bought some sheep. This spring, or more precisely, last week, they had lambs. I was bought up with goats and they had kids each year. I have always thought I would like my boy to have the wonderful experience of the birth of animals.

This experience has not been without some problems, the first triplets to be born died before we got to them, probably of cold. Therefore there was some anxiety about subsequent deliveries, a well founded anxiety because we had to assist with the next four births. The first ewe was not having proper contractions and had been in labour for several hours, she gave birth to two healthy (one huge!) lambs. The next had a lamb with the leg stuck back. We intervened earlier this time, having more confidence, and it is a good job we did, the presence of meconium in the amniotic fluid proves the lambs were becoming distressed. All turned out well again, and we had another pair of healthy female lambs. The last pair of lambs were born without intervention, but the second of the twins didn't seem to have an instinct to suckle so we ended up giving him some extra feeds to get him going. After 3 days of tube and bottle feeding he began to suckle for himself from his mother. Now we have 6 lambs and their mothers out in the field thriving, hooray!

Anyway, amidst all of this drama and excitement we have thrown plans and routines out of the window, worked together as a family and discovered new skills. I didn't know I would be able to pull a lamb from its mother and my husband has learned to milk a ewe and feed a lamb. Our son has been there through it all, gaining amazing experiences of birth and death and everything in between, including the boredom of waiting for hours for something to happen. He has witnessed his parents and Grandparents pulling together and helping out, using their various strengths and getting on with things that needed doing and has played his own essential part too.

Today marks an end to the freedom of going with the flow like that, and as we only have 3 ewes left to lamb things will naturally go back to the humdrum anyway. Of course I value school and the multitude of experiences he gains there, but it has been a quite a holiday!

Oh and I must add, he is just such great company even when we are just at home. He plays for hours with his Lego, I sew and we chat. Ahhhh, I cant wait for the summer, only 11 weeks to go...